by Heather Plett | Sep 9, 2015 | circle, growth, journey, Labyrinth
 This week, school is back in session. One of my daughters started today and the other two start tomorrow. Two are now in university and one is in grade 8, her last year before high school.
I can say all of the clichéd things, and mean them… My how time flies! Wasn’t it just yesterday I was changing their diapers? How did it all rush past in the blink of an eye?
The return to school always reminds me of the relentless and dependable forward motion of time. Tick, tick, tick goes the clock. Flip, flip, flip go the pages of the calendar.
Today I was rushing out for last minute school supplies, haircut appointments, musical instrument rental, etc., and in the middle of it all, I wanted to hit the pause button. I wanted to slow down the pace of time, enjoy a few more summer days, and cling to my daughters’ fleeting childhood before it all disappears.
From my daughters’ perspective, still in their formative years, this is the way life is supposed to be lived – growing each year, advancing one grade after the other, stepping always forward on the straight line of time guided by the clock and the calendar. It’s the way we’re all raised – to believe that there is always meant to be forward movement. That’s not a bad thing – we want growth to happen.
But that’s only part of the truth and there’s something else I really want my daughters to learn that they probably won’t be taught in school.
Life is to be lived along the spiral and not simply the straight line.
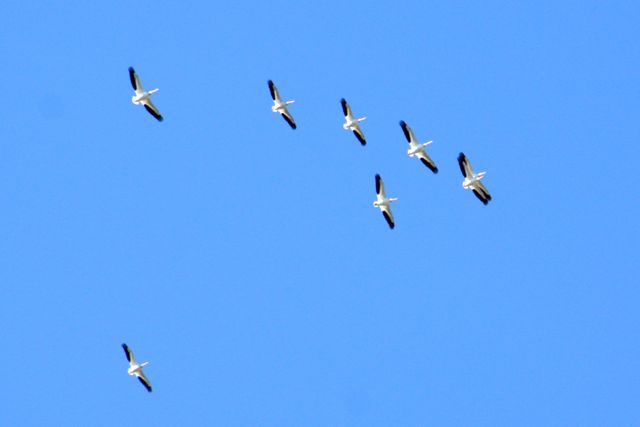
When I was at the beach this summer, working on my book, I spent a lot of time watching pelicans. One of the things I love about pelicans is that, often, they fly across the sky in giant spirals, round and round, adjusting the arc of the spiral just enough each time so that they end at the far side of the sky from where they started.
They do this to conserve energy, riding thermals (updrafts of warm air that rise from the ground into the air), so they don’t have to flap their wings as often. They look so content and relaxed up there, circling round and round with very little effort on their part. High in the sky, they look like mythical creatures, as if they’d climbed out of ancient legends of magicians and shamans. Their shape and the way they move holds both mystery and myth.
That’s the path that I have come to believe is the most true way of seeing our lives. We go round and round, coming back each time to nearly the same place we’ve been, but always with enough of a difference to help us progress forward over time.
How many times have you been in this place you’re at right now? Like the seasons, our lives come back again and again to the harvest of Fall, the dormancy of Winter, the rebirth of Spring, and the growth of Summer. And, like the seasons, we live through the long dark spells, the slow sunny days, the rain, the wind, and the snow. We cycle through grief, through growth, through joy, through surrender, and through ease.
None of the seasons lasts forever. All of them change us a little before we begin the spiral again.
If you are in a place you feel like you’ve been before – whether it’s another cycle through grief, restlessness, waiting, or fear – don’t despair. You’re simply spiralling through the sky, learning what you need to from this trip around the circle, and moving a little further each time.
If you were traveling up a mountain, you’d be best to take the spiralling path, adjusting to the altitude, not tiring yourself out too quickly. Like the pelicans floating on the thermal air, you conserve your energy by not rushing straight ahead. You also learn more and see more that way. This is the way life is meant to be lived.
Don’t rush through, even though the path might seem hard right now. Take what you need from this time, and let it unfold in the fullness of time.
If you want to take a closer look at your own spiral path, I invite you to join us for the October offering of The Spiral Path: A Woman’s Journey to Herself.
Interested in more articles like this? Add your name to my email list and you’ll receive a free ebook, A Path to Connection. I send out weekly newsletters and updates on my work.
by Heather Plett | Jan 22, 2015 | beauty, Wisdom, women
Last night I hosted a circle of women on Skype, and at the beginning of the call I read this poem:
Finding her here
by Jayne Brown
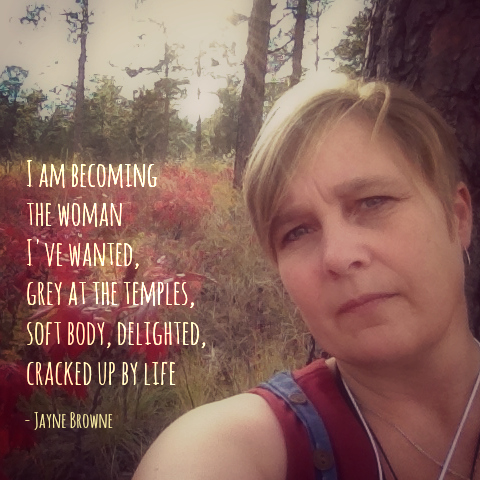
I am becoming the woman I’ve wanted,
grey at the temples,
soft body, delighted,
cracked up by life
with a laugh that’s known bitter
but, past it, got better,
knows she’s a survivor–
that whatever comes,
she can outlast it.
I am becoming a deep
weathered basket.
I am becoming the woman I’ve longed for,
the motherly lover
with arms strong and tender,
the growing up daughter
who blushes surprises.
I am becoming full moons
and sunrises.
I find her becoming,
this woman I’ve wanted,
who knows she’ll encompass,
who knows she’s sufficient,
knows where she’s going
and travels with passion.
Who remembers she’s precious,
but knows she’s not scarce–
who knows she is plenty,
plenty to share.
After the poem, I asked each woman to share something about the woman they are becoming. Some shared that they are becoming more confident, more open, more authentic, and more self-aware. Some are becoming leaders, spiritual guides, teachers, and wise grandmothers.
Several of the women remarked on the line “I am becoming a deep weathered basket.” They resonated with the image – becoming a vessel of whatever they’re called to carry, a little worn, beat up, and perhaps leaking, but still full of gift. The older women on the call focused on the world “weathered”, while one of the younger women said she was grateful for all that leaked out of those weathered baskets into her own, much less seasoned, basket.
When it was my turn to hold the virtual talking piece, my first top-of-mind response was “Satisfied. I am becoming more satisfied.”
I am becoming more satisfied that I am enough. I am becoming more satisfied that I have enough. I am becoming more satisfied that the work that I do is the right work and that I am living as authentically as I can. I am becoming more satisfied that I’m doing the best I can as a mother.
That thought surprised me, given the kind of day and month I’d had, but it popped out of my mouth and after I said it I knew that it was true.
Earlier that day, when one of my daughters had a crisis, I was worried that I hadn’t provided her with enough tools to weather the emotional storms when they come.
Earlier that month, when online sales were flat-lining and a class I was supposed to teach at university got canceled, I was worried that I wasn’t doing a good enough job in growing my business.
And yet, despite those worries, despite the fact that I am still full of human weakness – I still feel the jealousy well up when I see others with more success than me, I still suffer from insecurity when I think I’m not parenting well, I still get unreasonably angry when my husband doesn’t do something I expected him to do – I am becoming more satisfied.
I am not becoming more perfect. I’m not even sure, sometimes, that I’m becoming more wise. My questions increasingly outweigh my answers. But I am becoming more satisfied.
I won’t always parent well. I won’t always say the right things when I teach. I won’t always be successful in my business. My skin is becoming increasingly more saggy and my belly – well, it will never be as flat as I’d like.
BUT I’m learning to love myself more, I’m learning to forgive myself faster, I’m learning to trust that I’ll have the wisdom I need to get through the challenges, and that’s good enough.
With each disappointment, each challenge, each heartbreak, and each victory, I become more authentic, more satisfied, and more committed to being fully myself. As the poem says, I am becoming the woman “who knows she is plenty, plenty to share.”
Now it’s your turn… “Who are you becoming?” Are you satisfied with the answer?
I invite you to join me on a journey that will bring you closer to the woman you are becoming. When you sign up for The Spiral Path, you’ll receive 21 lessons, full of stories, inspiration, journal questions, and embodiment exercises that are designed to bring you closer and closer to the core of who you are. For only $45, you’ll receive a whole lot of content that has the potential to change your life.
Here’s what one participant said before she’d even worked all of the way through: “I’ve worked thru Lesson 9….I have shed tears, felt my anger, and looked at my fears up close and in 3-D. I have felt the darkness, and feel brave and courageous about sitting with it. I now feel much more comfortable in my body and am ready to move ahead and receive all the gifts that will come as a result of this work.” (Carol Brown)
Please join me as we all become the women we’ve wanted.
by Heather Plett | Jan 17, 2015 | Labyrinth, Spirituality, Uncategorized
 “Release, receive, and return.” That’s what the labyrinth invites us to do.
Yesterday, I needed to release, receive, and return. I was stressing out about the ongoing tension between “do the thing that brings in money” and “do the thing that’s calling you next” – the ever-present question of all soulful entrepreneurs.
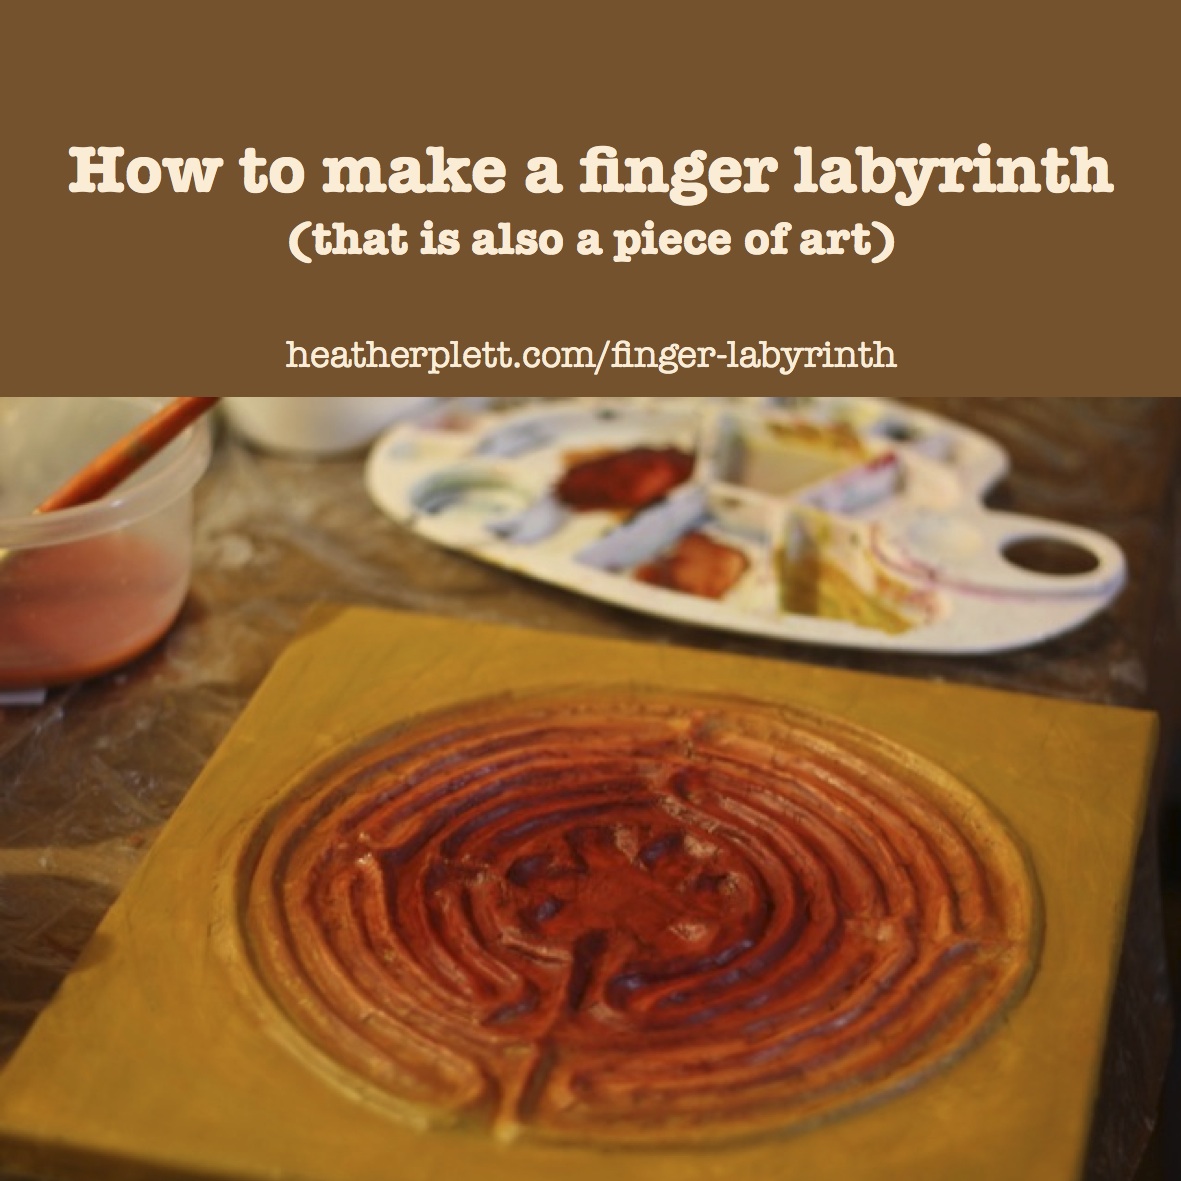
I wanted to go to the labyrinth, but it’s covered in snow, so I did the next best thing… I made a finger labyrinth. It turns out that making a labyrinth is almost as good as walking one for that whole “release, receive, and return thing.”
Since I use labyrinths a lot in my work (especially The Spiral Path, which is a 21 lesson journey through the labyrinth to your authentic heart), I thought I’d share the steps in making my finger labyrinth in case you’d like to make one too.
You’ll need:
- a square canvas or piece of wood (I used an 11X11″ canvas)
- a print out of your favourite labyrinth design, printed to the scale of the canvas (For an 11X11 canvas in the 7 path Chartres design that I made, here’s a pdf that prints on two 8.5X11 pieces of paper. If you prefer a different design, just Google “labyrinth template”)
- heavy string
- glue (I used a hot glue gun and white glue, but if you don’t have a glue gun, white glue is fine)
- newsprint or other paper (whatever you use should be fairly thin)
- mod podge (or just use gel medium)
- gel medium
- acrylic paint
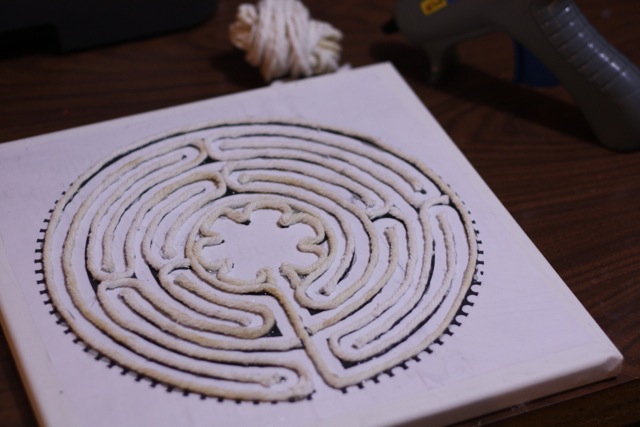
Step 1. Print the labyrinth design and glue it onto the canvas or board. I used ordinary white glue, spread thin with a spreader (any straight plastic edge, like an old credit card) will work. Use the spreader to work out any bubbles in the paper (though it doesn’t have to be too fussy, since you’ll cover it).
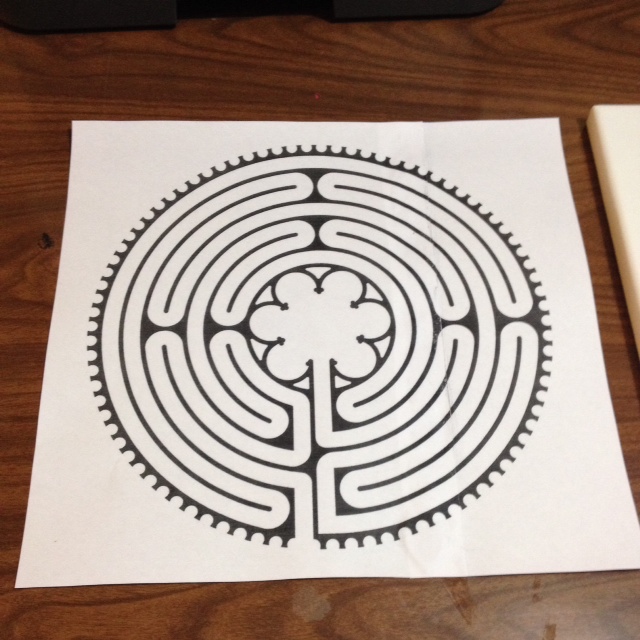
Step #2. Glue heavy string onto all of the black lines. I used the hot glue gun for this because it dries faster, but it would work fine with white glue.
Step #3. Cut lots of short strips of newsprint. I used blank newsprint, because it’s easier to paint over, but you could use newspaper. You could also use coloured paper if you don’t want to paint it. Tissue paper would also work, but you’d need a few layers to make sure the black is covered. The strips I used were approx. .75″ by 3″. You don’t have to be fussy about it, but you’ll want them wide enough to cover the string and adhere to the surface without covering two lines of string at the same time.
Step #4. Slather mod podge (or gel medium) generously on a section of string. Add a strip of paper and cover the paper with more mod podge (or gel medium). The best way to do this is with your fingers, so be prepared to get a little messy.
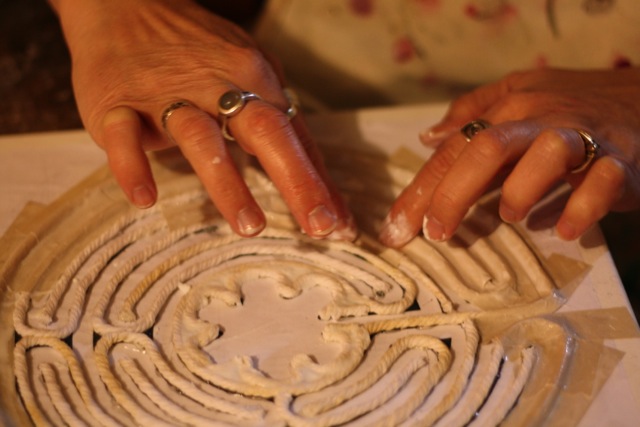
Step #5. Keep going until you have the whole labyrinth and canvas covered with strips of paper. Some spots are tricky (especially if you decide to do the flower pattern at the centre, like I did), so you’ll have to let go of your inner perfectionist and let it be a little imperfect. Make sure it’s all well coated with mod podge (or gel medium). Let it dry.
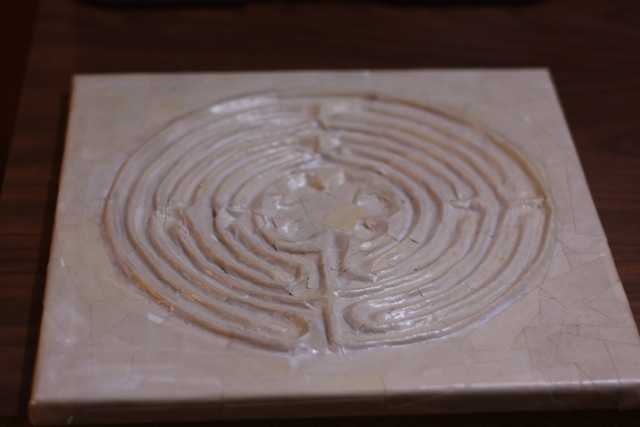
Step #6. If you want to paint it, add a layer of gel medium once it’s dry (this time you can do it with a paint brush) to smooth out some of the rough edges and to make sure the paint adheres to the surface.
Step #7. Paint it however you like. I used three tones of acrylic paint for the ombre effect (crimson, burnt sienna and ochre.
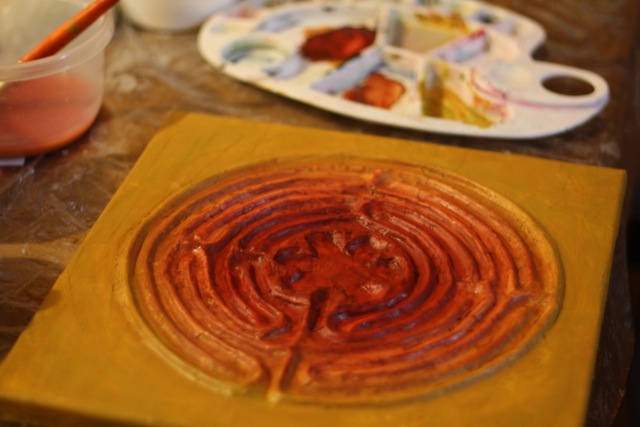
Step #8. If you want to give it a more textured, aged effect, rub a glaze over it. I used a brown glaze (acrylic paint mixed with gel medium) and rubbed it on with your fingers. Because I’d layered on the gel medium a little too thick, there were some cracks and the dark glazed picked these up, giving it a bit more of an aged look.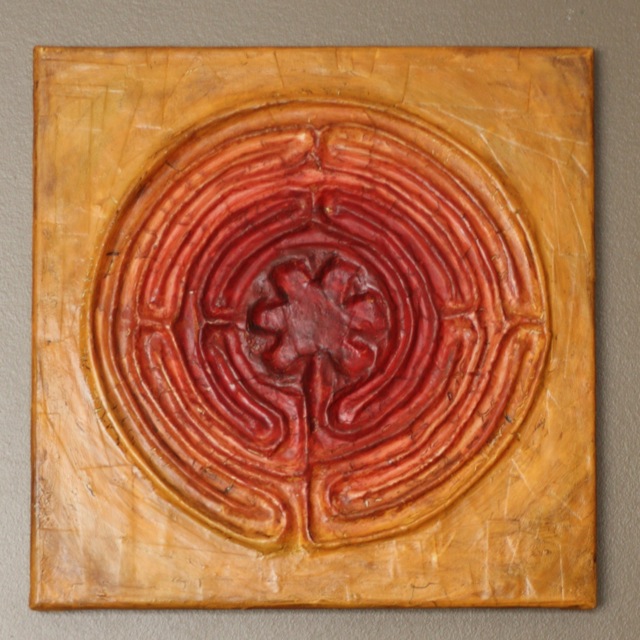
Step #9. Hang it on your wall or keep it in your studio, bedroom, or sanctuary where you can use it as a meditation tool.
Here are some tips for using your finger labyrinth…
- Before you start, take some time to settle in to a position in which you’re comfortable. Take some slow deep breaths to centre you in your practice.
- You may want to journal before and/or after the practice.
- Before you begin, you may wish to set an intention or ask a question that you will carry with you into the labyrinth, but be careful to keep it open-ended so that you’re open to surprise.
- Say a prayer, if you like, for support, healing, and guidance.
- Place a finger at the entrance of the labyrinth. Some people suggest that you use your non-dominant hand, as research suggests that our non-dominant hand has easier access to our intuition.
- As you follow the path with your finger inward, be conscious and intentional about releasing whatever stresses, worries, or distractions you might be feeling. Breathe deeply and slowly.
- Pause whenever you want, but don’t lift your finger off the labyrinth.
- When distracting thoughts come up, simply let them pass and wish them well as they leave your mind.
- When you reach the centre, pause for awhile and receive. Be open to whatever guidance and wisdom you may need, even if it’s not what you expected.
- When you’re ready, follow the path outward, consciously returning and bringing the wisdom of the centre out into your life with you.
- In your journal, write or sketch anything that came to you while you made the journey.
- Don’t try too hard. Sometimes the wisdom of the labyrinth is simply the pause that it forces you to take. Sometimes nothing obvious shows up, but that doesn’t mean it wasn’t time well spent. Stay open and receptive.
Starting February 1, 2015, you can join me in a 21 lesson journey through the labyrinth, back to your authentic heart in The Spiral Path: A Woman’s Journey to Herself. In the first seven lessons, you’ll release what no longer serves you. In the next seven lessons, you’ll open yourself to receiving. In the final seven lessons, you’ll return from the journey.
by Heather Plett | Oct 14, 2014 | journey, Labyrinth, mandala, painting, Passion, Spirituality, Uncategorized
I often use labyrinths in my retreats and workshops, and until now I’ve either used what’s available onsite, or I’ve created them with string, mowed them into grass, or made them out of dried leaves.
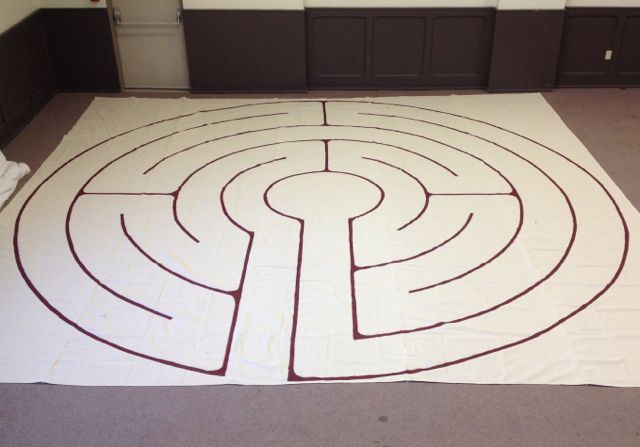
This weekend, I finally made a portable labyrinth that I can carry with me.
 When I shared the result on social media, several people asked for details about how I made it. Here’s how:
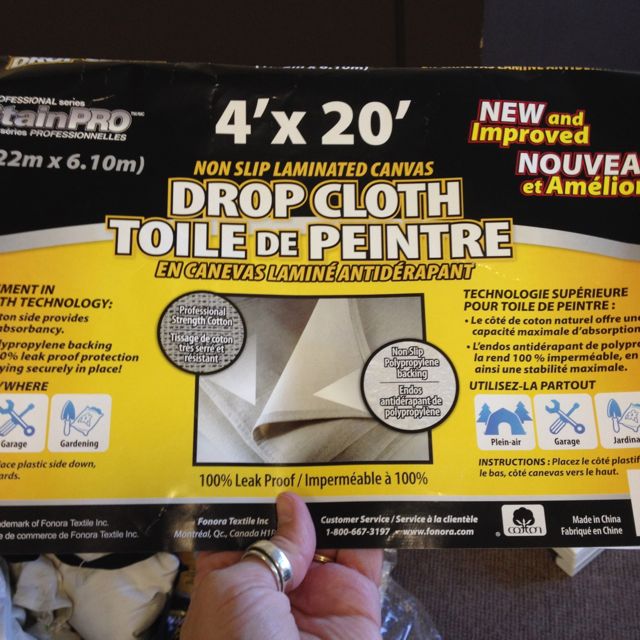
 1. Since canvas can be quite expensive, I looked for a less expensive alternative. At the local Home Depot, I found painting drop cloths that were 4′ x 20′. They worked well because they’re fabric on one side and plastic on the other so that they absorb the paint without soaking through to the floor. Plus they’re fairly light weight for easier transport. (They cost $22 each, so my total investment was $110, since I had all of the other materials on hand.)
2. I wanted to make my labyrinth approximately 20′ x 20′, so I bought 5 drop cloths and sewed them together. They’re hemmed along the long edges, and at first I was going to seam-rip all of the hems, but that was far too tedious, so I just cut off the hems (losing a bit of the width, but I was okay with that) and sewed them. Tip: I had access to a large space for my labyrinth creation (a church floor), and I recommend doing the sewing in a fairly large space too. It’s bulky and a little awkward.
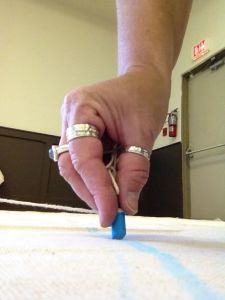 3. Once the dropcloths were sewn together, I drew the outline of the labyrinth with chalk. I started by measuring where my centre was and making a chalk mark there. Then I placed a paint can at the centre and tied a long string loosely on it to use as a giant compass/protractor. Tip: Make sure the string is loose enough on the can so that it rotates as you move around the circle.
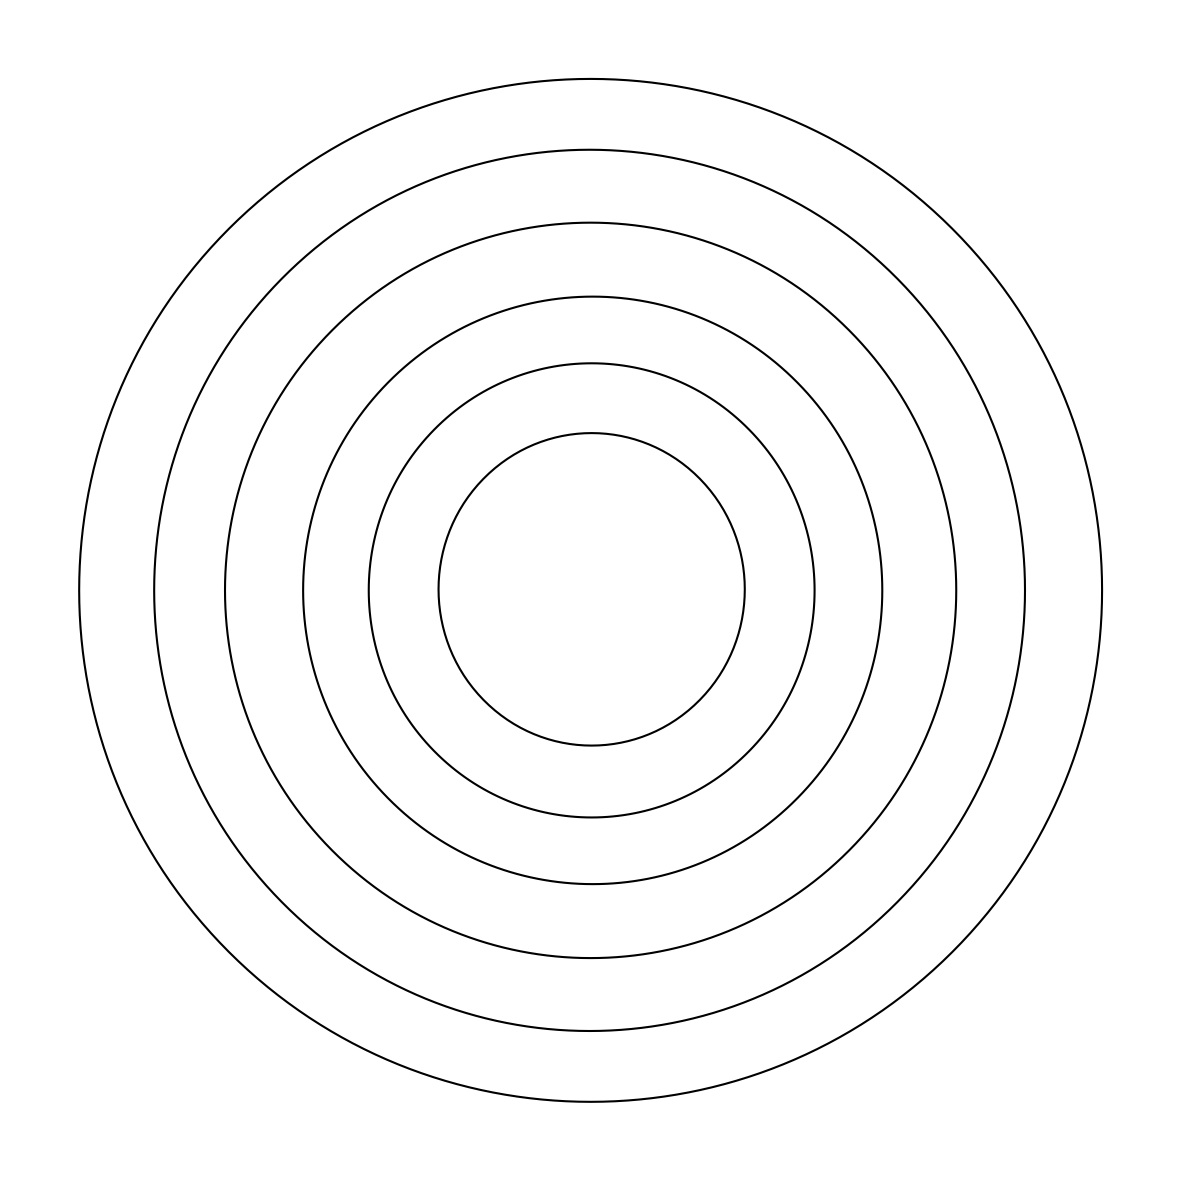
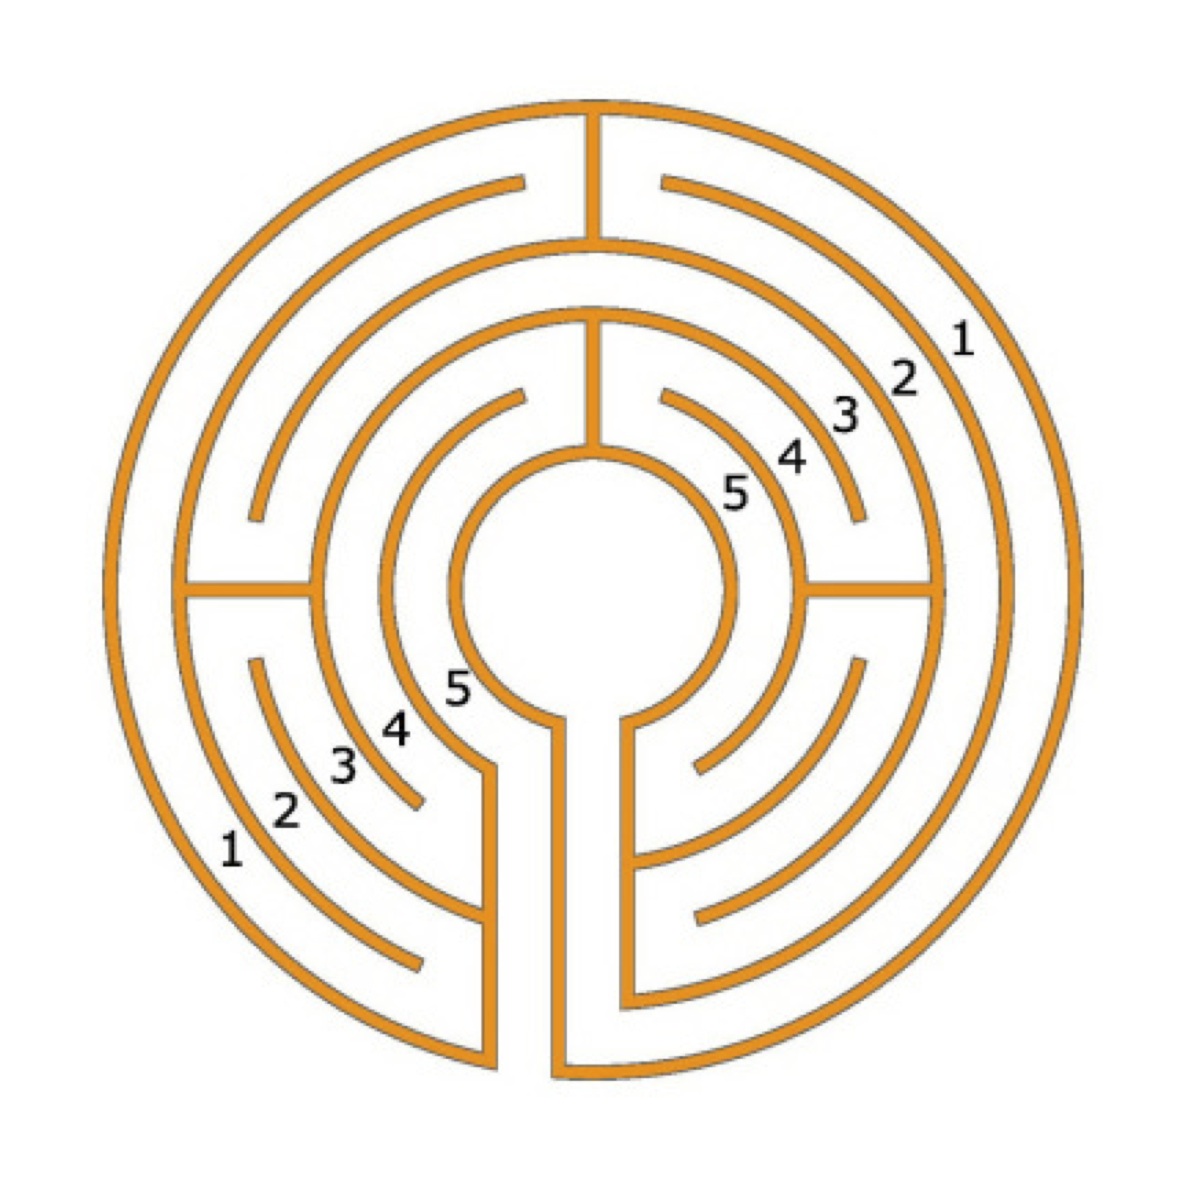
4. I wanted to make a 5-path version of the Chartres labyrinth. To figure out how wide my paths should be, I started by making the largest circle (to within a couple of inches of the edge of the canvas) and then making the centre circle (large enough that three people can comfortably stand in it). Then I measured the distance between the centre circle and the outside circle and divided it by 5. It came to 17.5 inches.
5. Shortening my string each time, I drew the concentric circles. 
6. From there, it’s a matter of drawing the horizontal and vertical lines and then erasing the parts of the circle that aren’t needed. As you’ll see in the design I used, the horizontal and vertical lines all connect circles, so you need to pay attention to which of the circles you’re connecting, and then measure the same width as your path (17.5″ in my case) from that line to know how much of the circle to erase. Tip: The chalk marks are easy to brush away with a household brush (I used a pot scrubber).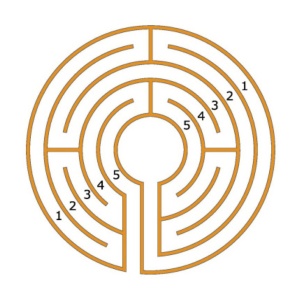
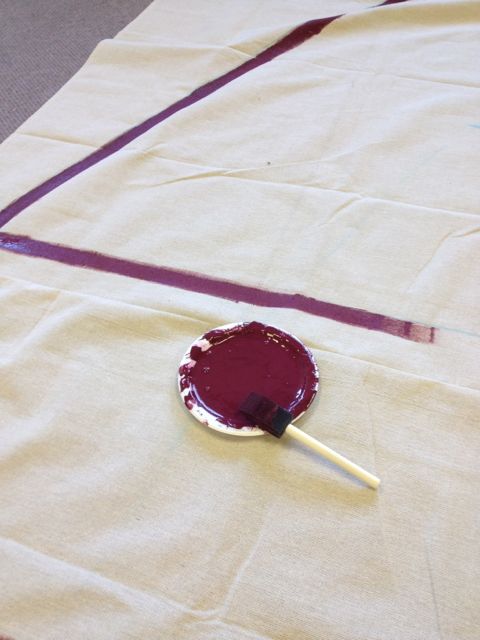
7. Once I had the chalk lines in place, I started painting. To keep it inexpensive, I used some leftover acrylic house paint for my lines, which worked great. I painted on the inside of each chalk line to keep it consistent.
8. For the width of the lines, I simply painted as wide as a small sponge brush. The edges of my lines are not very precise, since it’s hard to attain precision on fabric without driving yourself crazy, but I decided I was fine with that. It might have worked to put painters tape down, but that seemed like a lot of extra work to me (and I only had the space for a limited time) and I wasn’t sure how the tape would work around circles.
 9. After the paint had dried, I decided to touch up the edges a bit with a thinner brush. It took a fair bit of extra time, but I liked the more solid line, so it was worth it.
10. I let it dry for about 12 hours before folding it. It might have been a good idea to leave it longer, but the space was being used the next day so I needed to move it.
The hardest part of the whole process was all of the time spent (about 8 hours) crouching on the floor. By the end of it, I had a hard time unfolding my body! Stretching during my breaks helped, but I could have been more diligent.