by Heather Plett | Oct 14, 2014 | journey, Labyrinth, mandala, painting, Passion, Spirituality, Uncategorized
I often use labyrinths in my retreats and workshops, and until now I’ve either used what’s available onsite, or I’ve created them with string, mowed them into grass, or made them out of dried leaves.
This weekend, I finally made a portable labyrinth that I can carry with me.
 When I shared the result on social media, several people asked for details about how I made it. Here’s how:
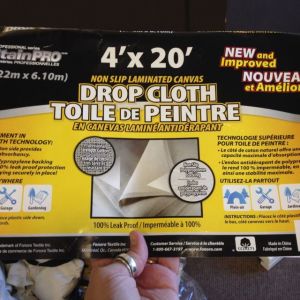 1. Since canvas can be quite expensive, I looked for a less expensive alternative. At the local Home Depot, I found painting drop cloths that were 4′ x 20′. They worked well because they’re fabric on one side and plastic on the other so that they absorb the paint without soaking through to the floor. Plus they’re fairly light weight for easier transport. (They cost $22 each, so my total investment was $110, since I had all of the other materials on hand.)
2. I wanted to make my labyrinth approximately 20′ x 20′, so I bought 5 drop cloths and sewed them together. They’re hemmed along the long edges, and at first I was going to seam-rip all of the hems, but that was far too tedious, so I just cut off the hems (losing a bit of the width, but I was okay with that) and sewed them. Tip: I had access to a large space for my labyrinth creation (a church floor), and I recommend doing the sewing in a fairly large space too. It’s bulky and a little awkward.
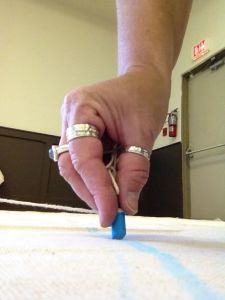 3. Once the dropcloths were sewn together, I drew the outline of the labyrinth with chalk. I started by measuring where my centre was and making a chalk mark there. Then I placed a paint can at the centre and tied a long string loosely on it to use as a giant compass/protractor. Tip: Make sure the string is loose enough on the can so that it rotates as you move around the circle.
4. I wanted to make a 5-path version of the Chartres labyrinth. To figure out how wide my paths should be, I started by making the largest circle (to within a couple of inches of the edge of the canvas) and then making the centre circle (large enough that three people can comfortably stand in it). Then I measured the distance between the centre circle and the outside circle and divided it by 5. It came to 17.5 inches.
5. Shortening my string each time, I drew the concentric circles. 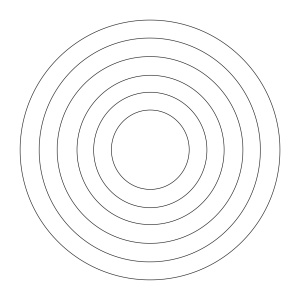
6. From there, it’s a matter of drawing the horizontal and vertical lines and then erasing the parts of the circle that aren’t needed. As you’ll see in the design I used, the horizontal and vertical lines all connect circles, so you need to pay attention to which of the circles you’re connecting, and then measure the same width as your path (17.5″ in my case) from that line to know how much of the circle to erase. Tip: The chalk marks are easy to brush away with a household brush (I used a pot scrubber).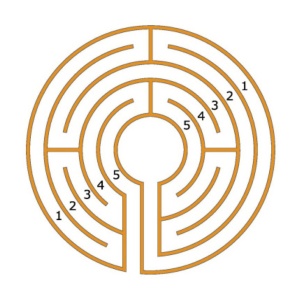
7. Once I had the chalk lines in place, I started painting. To keep it inexpensive, I used some leftover acrylic house paint for my lines, which worked great. I painted on the inside of each chalk line to keep it consistent.
8. For the width of the lines, I simply painted as wide as a small sponge brush. The edges of my lines are not very precise, since it’s hard to attain precision on fabric without driving yourself crazy, but I decided I was fine with that. It might have worked to put painters tape down, but that seemed like a lot of extra work to me (and I only had the space for a limited time) and I wasn’t sure how the tape would work around circles.
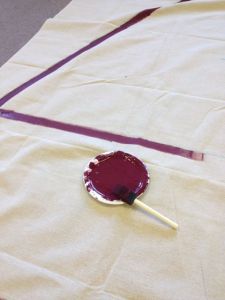 9. After the paint had dried, I decided to touch up the edges a bit with a thinner brush. It took a fair bit of extra time, but I liked the more solid line, so it was worth it.
10. I let it dry for about 12 hours before folding it. It might have been a good idea to leave it longer, but the space was being used the next day so I needed to move it.
The hardest part of the whole process was all of the time spent (about 8 hours) crouching on the floor. By the end of it, I had a hard time unfolding my body! Stretching during my breaks helped, but I could have been more diligent.
by Heather Plett | Nov 23, 2009 | Creativity, painting
I like strong hands, especially on a woman. I’m not one for dainty, perfectly manicured hands. Give me strong work-worn hands with a firm grip over pale wimpy ones any day.
When I was traveling in India and Bangladesh last year, I often found myself captivated by women’s hands. As in most developing countries, the women tend to do the lion’s share of the work, especially on the farm. I’ve seen women maneuver plows, haul boats ashore, hand-wash their laundry on rocks by the river, cook meals over small household fire pits, carry water in large earthenware jugs, weave baskets, care for children, the sick, and the elderly, pound wheat into flour, carry home the firewood, dig up fresh potatoes, and build their homes out of twigs and mud. Such strong hands I have seen in so many places!
This weekend I tried to capture some of that strength in my painting. I haven’t done watercolour in a few months, so it was lovely to have some time on Friday to get lost in the paints again.
It turns out hands are really hard to paint. Almost as hard as faces. My first attempts kept looking more like claws than hands. In the end I was more satisfied with the hands in the bottom two frames than the face in the top. (The face gave me no end of trouble because I was trying to capture the shadows that were cast on that really sunny day when we met Mina Baidya, the woman with the water jug. It’s close, but not quite right.) I find it interesting that even though these photos were taken in 3 different regions (2 in India and one in Bangladesh), all of the women were wearing the same bracelets. And all three were wearing beautiful, brilliantly coloured saris even thought it was just an ordinary work day for them.
Note: it’s not the best photo of it, since I had to take it inside with the flash. Plus it wasn’t on a flat surface, so the top looks a little warped. If you’re interested in seeing the original photos, look here, here, and here.
by Heather Plett | Feb 21, 2009 | art, Creativity, fearless, painting
I used to visit art supply stores and stand and gaze longingly at the rows and rows of paint tubes and brushes. I’ve done that for years. I wanted to paint so badly, but it was completely overwhelming for me. I had no idea what brushes to start with (what if I used the wrong one?) or which kind of paint did what (what’s the difference between watercolour and acrylic?), and besides, I could barely draw a stick figure, so what made me think I could paint?
Friends would take up painting, and I’d be so jealous, but I never signed up for a course. “I’ll probably fail,” I told myself. “I’m not very artistic.”
That was before my year of living fearlessly. This year, I knew I couldn’t let those layers of fear and doubt stand in the way of something I’ve wanted to do since I was a child. This year, I would paint, even if I accomplished nothing more than a stick figure and a tree that looked like a 6 year old’s fingerpainting. This year, I wasn’t letting failure stand in my way.
I signed up for a class and started buying supplies. But every time I took my supply list into an art supply store, I got that overwhelming, choking feeling again. What was a #1 brush? Was I supposed to buy the paint in tubes or in little cakes like the kindergarten paints? I bought a few supplies, but put off most of it until the night before the class.
Then the worst happened – the night before the class turned out to be the night OF the class. I’d looked at the dates wrong. I had to rush to the only store within easy driving distance, grab whatever I could find, and show up at class 15 minutes late with only half of my supplies. My heart was in my throat. This was NOT the way to start something this scary!
The first 15 minutes of the class were horrible. Others had already started and I didn’t get the instructions right. Plus I had to borrow a few things from my seat mate. If Marcel hadn’t dropped me off and left me without a car, I might have packed up and gone home.
But then, when water mixed with paint and paint started hitting paper, a transformation began to unfold. The paper, the paint, the paint brushes – they all took hold of me, lifted me out of myself, and the stress began to seep out of my body drop by drop. How incredibly good the paint brush felt in my hand! How incredibly right! I almost started crying right there in that high school art room. This was what I had been waiting for all these years!
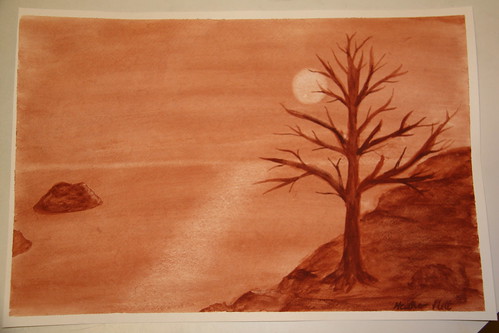
Even though we only painted in monochrome that night, and the result was hardly worth bragging about, I knew that I had fallen in love. For too many years this passion had been waiting for fear to loosen its grip so that it could be born – now it was time to let it see the light of day.
Five classes later (too quickly it passed), we were getting ready for the final class. “Bring in a picture to the second last class,” she’d said. “Something that is special to you. You’re going to paint your first masterpiece during the final class.” I selected a few that I thought I was capable of (some easy landscapes and silhouettes), and threw in the one I really wanted to paint but doubted that I could – one of my favourite photos from Ethiopia. “These are easy,” she said, flipping through the top of the pile, “you can paint these.” Then she looked at the last one – the special one. “You want to paint that?” she said, a little incredulously. I felt the doubt rise again. Maybe she didn’t like it. Maybe she thought I couldn’t do it. Oh what was I thinking – of COURSE I can’t do it! I nodded sheepishly. “Yeah, I think you could probably do that if you tried hard enough.” Really? “You probably won’t finish it in one day, and you’ll have to do the sketching before the class so you use the time in class well.”
Gulp. Was I really going to try? What if I failed? Would I want to come back for another class next session, or would I give up? Maybe I should just do the silhouette of the acacia tree from my Kenya pictures. It was so much easier.
But “easy” wasn’t what I’d signed up for. I decided to try regardless of how it scared me. I did the preparation work and showed up at class early this time. I was determined. This was not going to be the end of painting for me. I was not going to let fear hold me back. I was determined, but nervous, and almost positive I would fail.
And then, the minute I touched paintbrush to paper, I entered that zen-like state and got lost in the painting all over again. The hours drifted away while I let the paint carry me. Bit by bit, I watched the art unfold. First grey sky, then the landscape. That was the easy part. Would I be able to paint convincing people? The first one turned out not bad. The second was even better. By the third one, I began to believe that I could actually DO this!
I didn’t finish that night, but the next night, while Marcel was away and the girls got to watch a little extra TV, I finished the last piece – the baskets. When I was done, I stepped back and… well, it was GOOD! I had actually painted something I could be proud of!
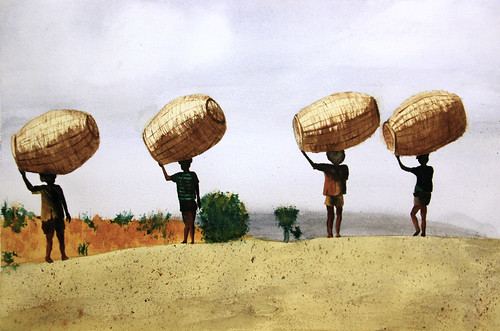
I have been on cloud nine ever since. Who knew I could paint? Certainly not me!
(If you want to see my progress throughout the classes, you can see all of my attempts in a slideshow here.)
 When I shared the result on social media, several people asked for details about how I made it. Here’s how:
 1. Since canvas can be quite expensive, I looked for a less expensive alternative. At the local Home Depot, I found painting drop cloths that were 4′ x 20′. They worked well because they’re fabric on one side and plastic on the other so that they absorb the paint without soaking through to the floor. Plus they’re fairly light weight for easier transport. (They cost $22 each, so my total investment was $110, since I had all of the other materials on hand.)
 3. Once the dropcloths were sewn together, I drew the outline of the labyrinth with chalk. I started by measuring where my centre was and making a chalk mark there. Then I placed a paint can at the centre and tied a long string loosely on it to use as a giant compass/protractor. Tip: Make sure the string is loose enough on the can so that it rotates as you move around the circle.

 9. After the paint had dried, I decided to touch up the edges a bit with a thinner brush. It took a fair bit of extra time, but I liked the more solid line, so it was worth it.


