 “Release, receive, and return.” That’s what the labyrinth invites us to do.
Yesterday, I needed to release, receive, and return. I was stressing out about the ongoing tension between “do the thing that brings in money” and “do the thing that’s calling you next” – the ever-present question of all soulful entrepreneurs.
I wanted to go to the labyrinth, but it’s covered in snow, so I did the next best thing… I made a finger labyrinth. It turns out that making a labyrinth is almost as good as walking one for that whole “release, receive, and return thing.”
Since I use labyrinths a lot in my work (especially The Spiral Path, which is a 21 lesson journey through the labyrinth to your authentic heart), I thought I’d share the steps in making my finger labyrinth in case you’d like to make one too.
You’ll need:
- a square canvas or piece of wood (I used an 11X11″ canvas)
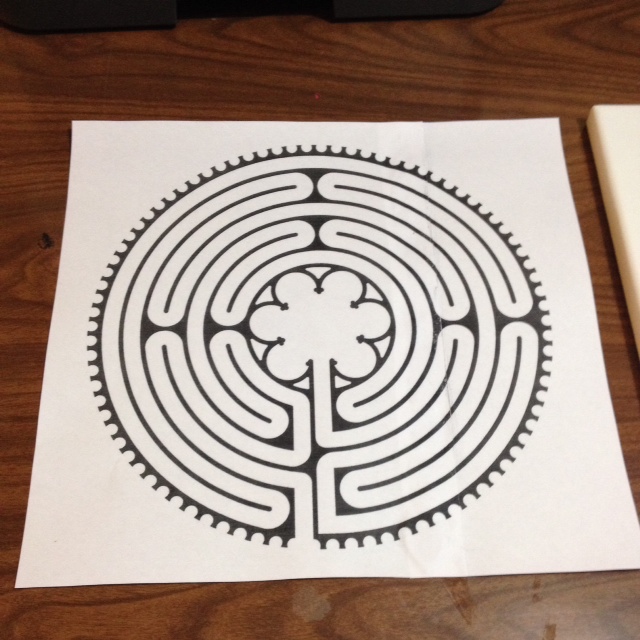
- a print out of your favourite labyrinth design, printed to the scale of the canvas (For an 11X11 canvas in the 7 path Chartres design that I made, here’s a pdf that prints on two 8.5X11 pieces of paper. If you prefer a different design, just Google “labyrinth template”)
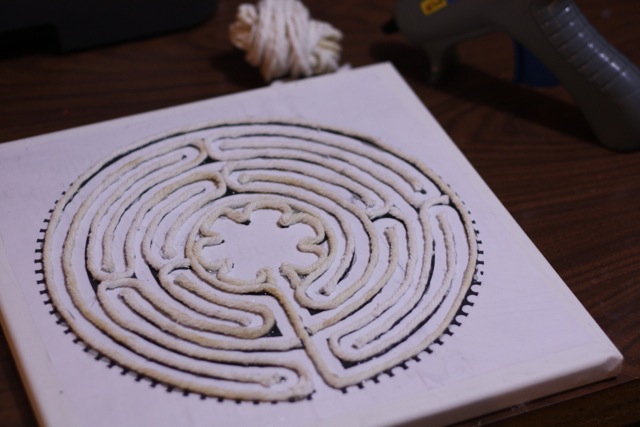
- heavy string
- glue (I used a hot glue gun and white glue, but if you don’t have a glue gun, white glue is fine)
- newsprint or other paper (whatever you use should be fairly thin)
- mod podge (or just use gel medium)
- gel medium
- acrylic paint
Step 1. Print the labyrinth design and glue it onto the canvas or board. I used ordinary white glue, spread thin with a spreader (any straight plastic edge, like an old credit card) will work. Use the spreader to work out any bubbles in the paper (though it doesn’t have to be too fussy, since you’ll cover it).
Step #2. Glue heavy string onto all of the black lines. I used the hot glue gun for this because it dries faster, but it would work fine with white glue.
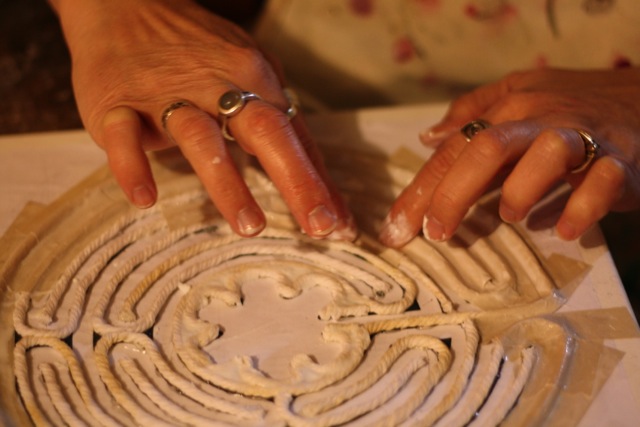
Step #3. Cut lots of short strips of newsprint. I used blank newsprint, because it’s easier to paint over, but you could use newspaper. You could also use coloured paper if you don’t want to paint it. Tissue paper would also work, but you’d need a few layers to make sure the black is covered. The strips I used were approx. .75″ by 3″. You don’t have to be fussy about it, but you’ll want them wide enough to cover the string and adhere to the surface without covering two lines of string at the same time.
Step #4. Slather mod podge (or gel medium) generously on a section of string. Add a strip of paper and cover the paper with more mod podge (or gel medium). The best way to do this is with your fingers, so be prepared to get a little messy.
Step #5. Keep going until you have the whole labyrinth and canvas covered with strips of paper. Some spots are tricky (especially if you decide to do the flower pattern at the centre, like I did), so you’ll have to let go of your inner perfectionist and let it be a little imperfect. Make sure it’s all well coated with mod podge (or gel medium). Let it dry.
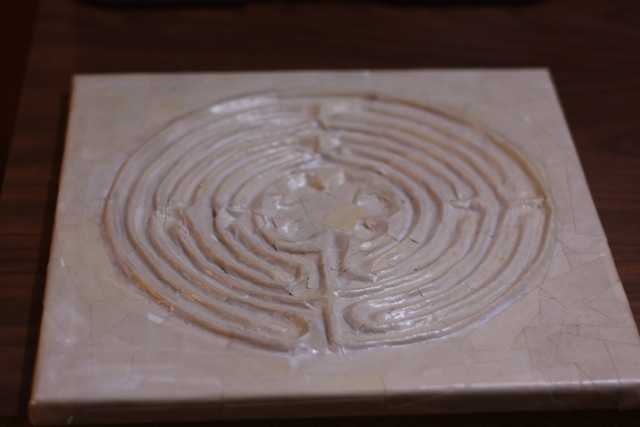
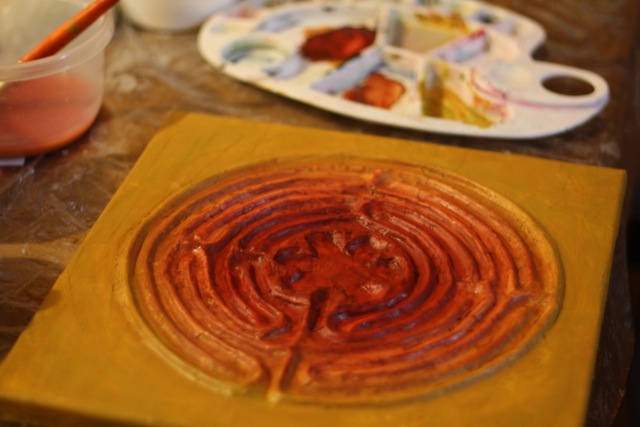
Step #6. If you want to paint it, add a layer of gel medium once it’s dry (this time you can do it with a paint brush) to smooth out some of the rough edges and to make sure the paint adheres to the surface.
Step #7. Paint it however you like. I used three tones of acrylic paint for the ombre effect (crimson, burnt sienna and ochre.
Step #8. If you want to give it a more textured, aged effect, rub a glaze over it. I used a brown glaze (acrylic paint mixed with gel medium) and rubbed it on with your fingers. Because I’d layered on the gel medium a little too thick, there were some cracks and the dark glazed picked these up, giving it a bit more of an aged look.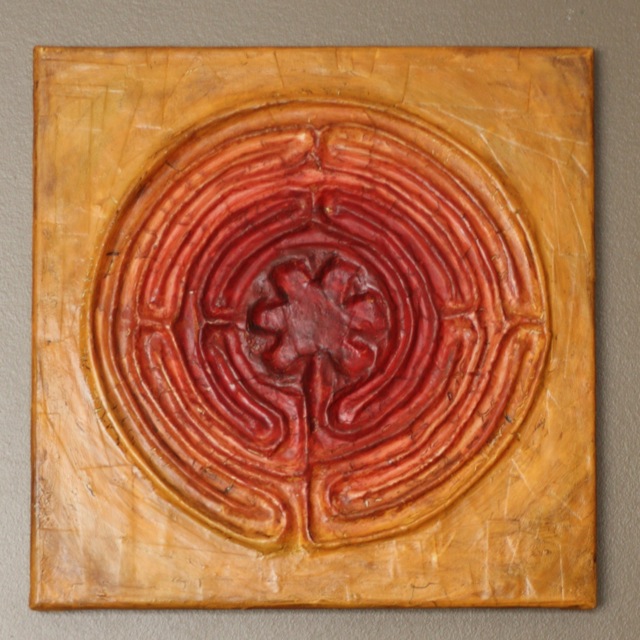
Step #9. Hang it on your wall or keep it in your studio, bedroom, or sanctuary where you can use it as a meditation tool.
Here are some tips for using your finger labyrinth…
- Before you start, take some time to settle in to a position in which you’re comfortable. Take some slow deep breaths to centre you in your practice.
- You may want to journal before and/or after the practice.
- Before you begin, you may wish to set an intention or ask a question that you will carry with you into the labyrinth, but be careful to keep it open-ended so that you’re open to surprise.
- Say a prayer, if you like, for support, healing, and guidance.
- Place a finger at the entrance of the labyrinth. Some people suggest that you use your non-dominant hand, as research suggests that our non-dominant hand has easier access to our intuition.
- As you follow the path with your finger inward, be conscious and intentional about releasing whatever stresses, worries, or distractions you might be feeling. Breathe deeply and slowly.
- Pause whenever you want, but don’t lift your finger off the labyrinth.
- When distracting thoughts come up, simply let them pass and wish them well as they leave your mind.
- When you reach the centre, pause for awhile and receive. Be open to whatever guidance and wisdom you may need, even if it’s not what you expected.
- When you’re ready, follow the path outward, consciously returning and bringing the wisdom of the centre out into your life with you.
- In your journal, write or sketch anything that came to you while you made the journey.
- Don’t try too hard. Sometimes the wisdom of the labyrinth is simply the pause that it forces you to take. Sometimes nothing obvious shows up, but that doesn’t mean it wasn’t time well spent. Stay open and receptive.
Starting February 1, 2015, you can join me in a 21 lesson journey through the labyrinth, back to your authentic heart in The Spiral Path: A Woman’s Journey to Herself. In the first seven lessons, you’ll release what no longer serves you. In the next seven lessons, you’ll open yourself to receiving. In the final seven lessons, you’ll return from the journey.

